
What you’ll need for a reversible Bible cover:
- 2/3 yard main fabric
- 1 1/4 yard contrast (if you want it all to be the same color, then just combine these two amounts)
- 2-2 1/2 yards wide lace
- matching thread
- two 15 inch lengths of matching ribbon for bookmark
Non-Reversible Bible cover:
- 3/4 yard main fabric
- 2/3 yard contrasting fabric
- matching thread
- two 15 inch lengths of matching ribbon for bookmark
If you’d prefer lace over a ruffle, you can subtract a 1/3 of the yard of contrasting fabric. You’ll need the same amount of lace as for a reversible cover.
Measurements:
The measurements of the Bible cover itself are:
- 10 1/2″ long (this is from seam to seam, it doesn’t include the ruffle)
- 17 3/4 wide (when open, from seam to seam)
The Bible I have is 9 1/2″ long x 7″ wide x 2″ thick. It also pretty comfortably fits my sisters’ Bibles that are 9″ long x 5 3/4″ wide x 1 1/2″ thick.
Method:
Cut out the material as directed below. If you are having trouble seeing the pattern, click here to print it off.
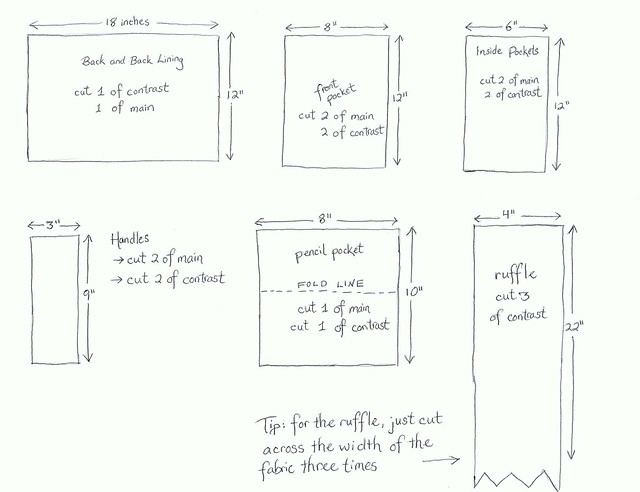
Cutting directions for a non-reversible Bible cover:
- Back and Back Lining: cut 2 of main material
- Front Pocket: cut 2 of main material
- Inside Pockets: cut 4 of contrasting material
- Handles: cut two of main material
- Pencil pocket: cut one of contrasting material
- Ruffle: same as for reversible, unless you’re doing lace, then just skip this.
Please note that the directions for cutting certain ones out of the ‘main’ or ‘contrast’ are only suggestions. You can mix it up however you like!
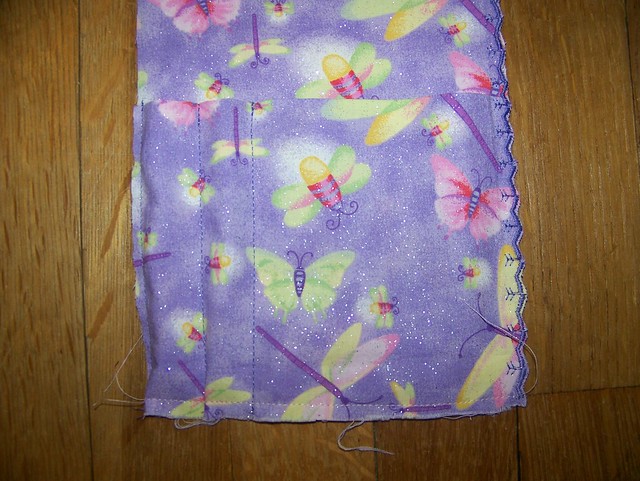
Step 1: Prepare your front pocket
Take your two pocket pieces and put them right sides together. Stitch a 1/2 inch seam along both long sides. Turn and press.
I did a slight variation here on mine and only stitched along the inside on the left seam, and then after I pressed it, I used a decorative stitch on the right side. You could also put a narrow lace on this side
Fold your back piece in half to find the midpoint. Line up your front pocket with the midpoint and top stitch it down. I don’t have this pictured, but baste across the top and bottom of the front pocket to keep it in place.
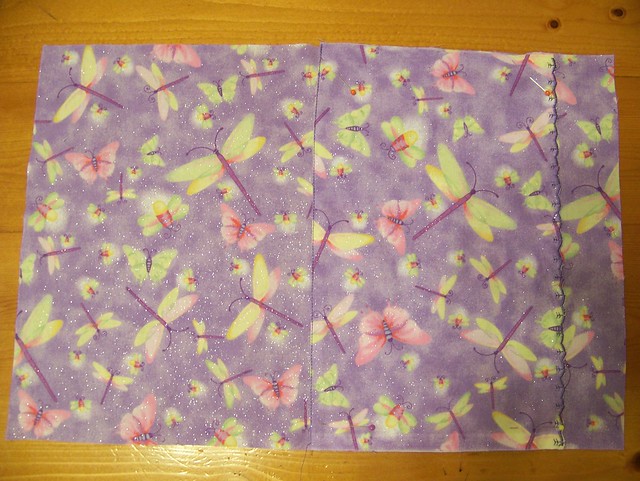
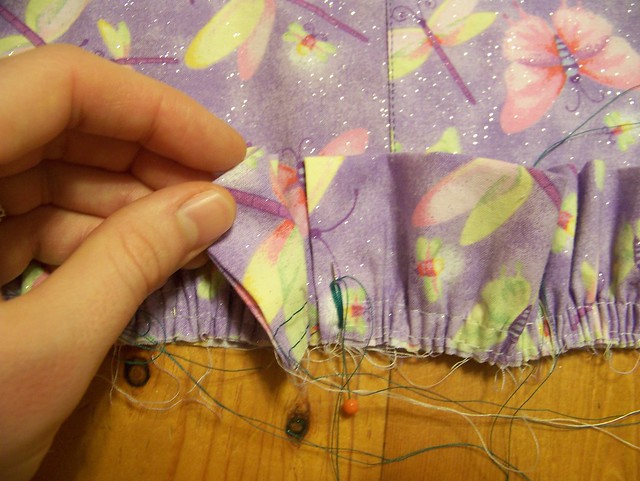
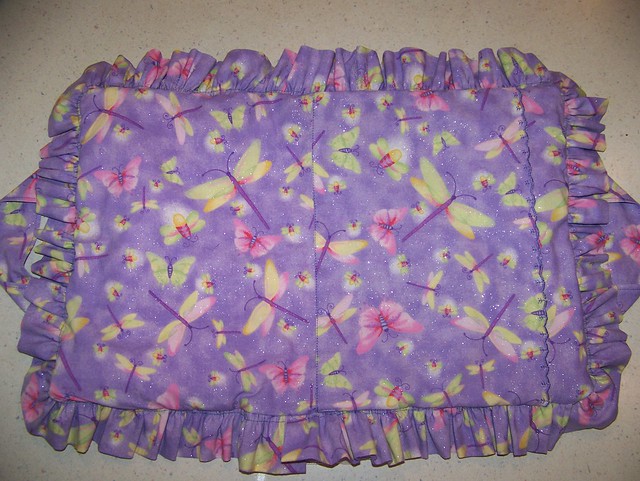
Step 2: Make your ruffle
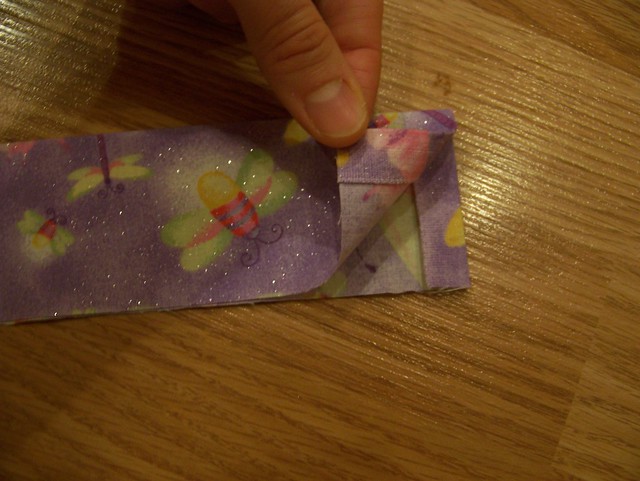
Take your three ruffle pieces and sew them together with a 1/2 inch seam, so that you now have one straight and long ruffle piece. Press the seams open. Fold the ruffle in half and press it with a hot iron. Then take the edges and press them inside about 1/2 inch (as shown below) so that the raw edges are now inside. You can stitch across the ends if you’d like, to keep it from fraying whenever you wash it, however, if they are the salvage edges, you don’t have to worry about stitching across it.
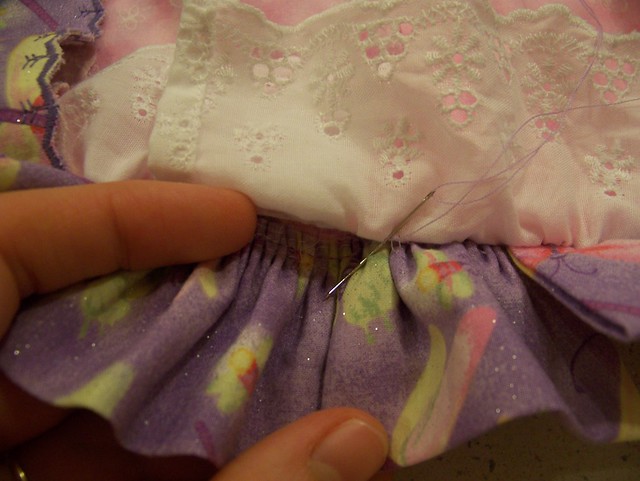
Stitch all along the raw edge of the ruffle with a long stitch (4.0 or longer). Do one row close to the edge (with the edge of the material running alongside the edge of the presser foot), and then another row about 1/2 inch parallel to your previous row. Leave long tails…at least 6 inches long. Pull up the gathers until it fits around the back and pin it down. I like to put my pins in vertically so that I can just stitch right over them.

To help make sure your ruffles are evenly spaced, find the middle seam on the ruffle and line it up with the midpoint on the top. Then overlap your ruffle ends at the midpoint on the bottom. Arrange and spread the ruffle and pin it down. Baste down the ruffle, being careful not to catch the tops of the ruffles on the corners where it is more likely to flop down in the way and catch.
 |
| {showing where the ruffle overlaps at the bottom midpoint.} |
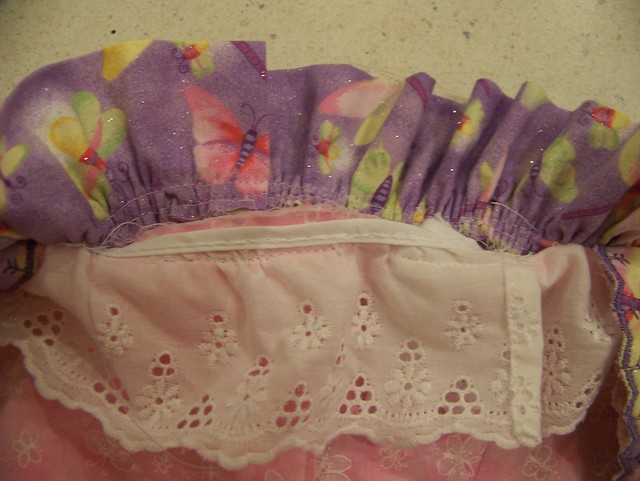
If you are doing lace, you pin and baste it on much the same way. Pin the right side of the lace down to the right side of the fabric. Just make sure that you fold the ends of the lace so that the raw edges won’t show. I often “hem” the edge of the lace to keep it from fraying when it gets washed.
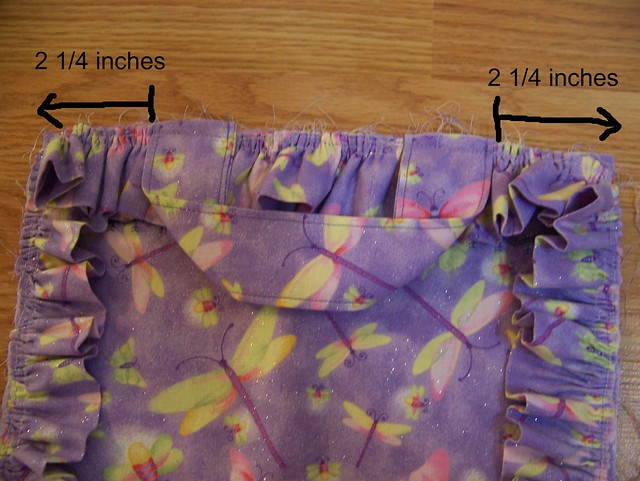
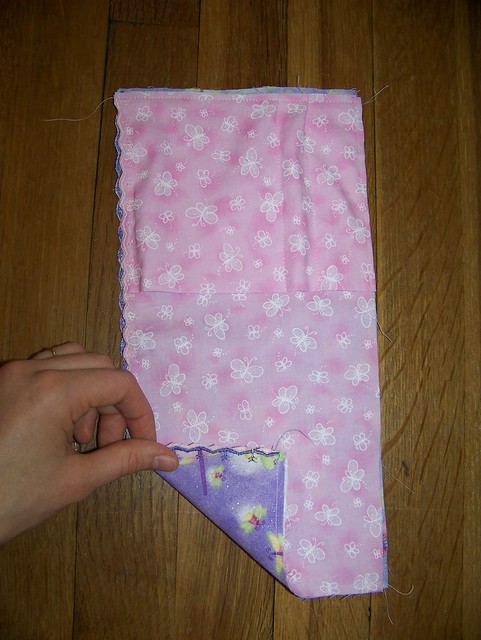
Step 3: Handles
Fold your handles right sides together and sew along the long raw edge with a 3/8 seam. Turn and press. Top stitch along both raw edges.

Baste your handles to the short sides of the back, 2 1/4 inches from the top and bottom as shown.
If you are doing a reversible Bible cover, repeat this for the other side. Only I don’t recommend doing a ruffle on both sides. I usually do lace on one side and a ruffle on the other to keep it from getting too bulky.
Step 4: Making the Pencil Pocket and Inside Pockets
Fold the pencil pocket in half on the fold line, and press. Take one of your Inside Pocket pieces and baste the pencil pocket on the left side of your inside pocket to hold it in place for the next step.
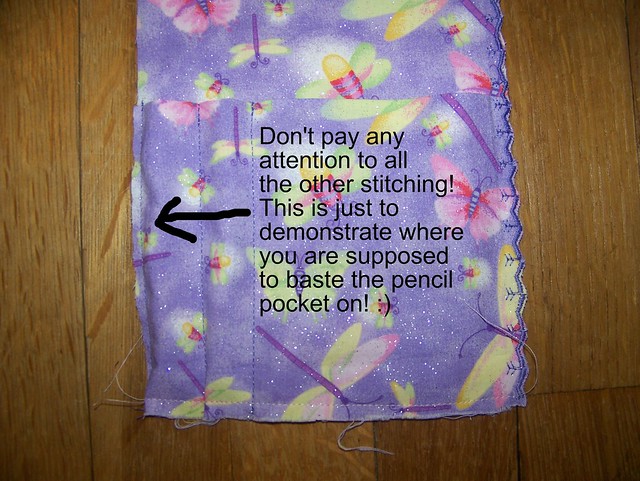
Now you can decide how many pencil pockets you’d like. I usually do two, and then leave a little pocket for small papers or an eraser. What I usually do is use a pencil to guide where to sew. I have allowed extra material on this piece, so that you have plenty to work with. You will actually be trimming some off because it is too long.

Okay, now you can pay attention to the other stitching in the picture! Remember that you are going to have approximately 1/2 seam allowance on that left side, so keep that in mind if you are making a pencil pocket! You can now trim the extra fabric on the pencil pocket, baste it down to the inside pocket, and finish the edge either with a fancy stitch, like is shown here, or you can just do a rolled hem. I’ve done it both ways before.
Do this for both your main and contrasting materials, just make sure that your pencil pocket is on the left Inside Pocket, unless you like having your pencils in the back of your Bible.
Now you can baste the pockets together. Do a pencil pocket side and a non-pencil-pocket side together, and baste along the three edges as shown.
If you are doing a non-reversible Bible cover:
Do the inside and pencil pockets the same way, only do one pencil pocket.
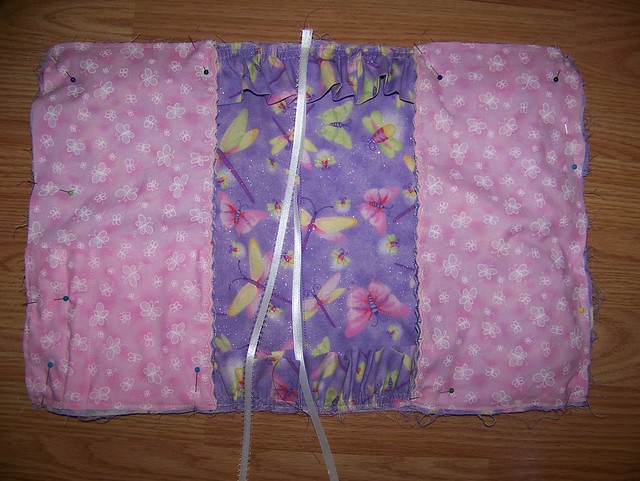
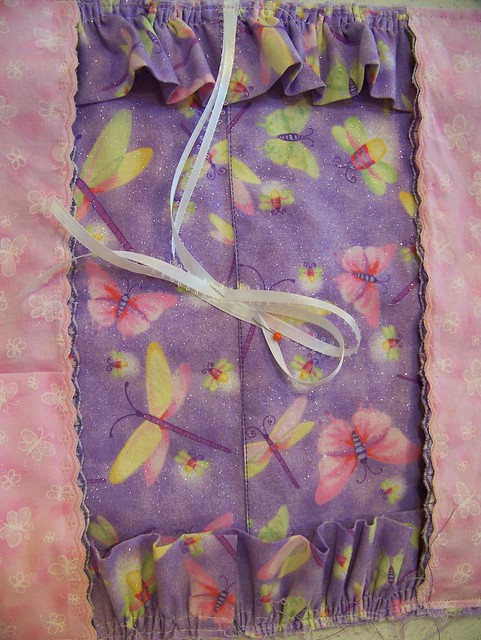
Step 5: Putting it together!
Lay out your Bible cover Back, with the front pocket on the left. Pin down the corners where there is extra ruffle so that both the corners and the pins don’t get caught in the 1/2 seam allowance you are going to take (see how the lace is done a couple of pictures farther down in the post.)
Now pin the inside pockets as shown. The purple pencil pocket should be facing the purple material, on the right. The pink pencil pocket should be facing you, on the left. Baste around the edges of the pockets.
Baste in your ribbons at the top midpoint of the Bible cover.
Now, remember the contrasting side you did with the lace?

Pin down the corners on your lace, so that both the extra lace in the corners, AND the pins don’t catch in the 1/2 seam allowance you are going to take on the edges.
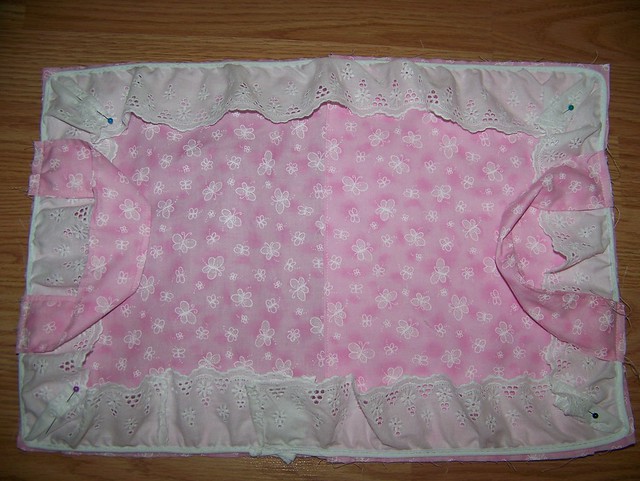
Pin the ribbons up out of the way…
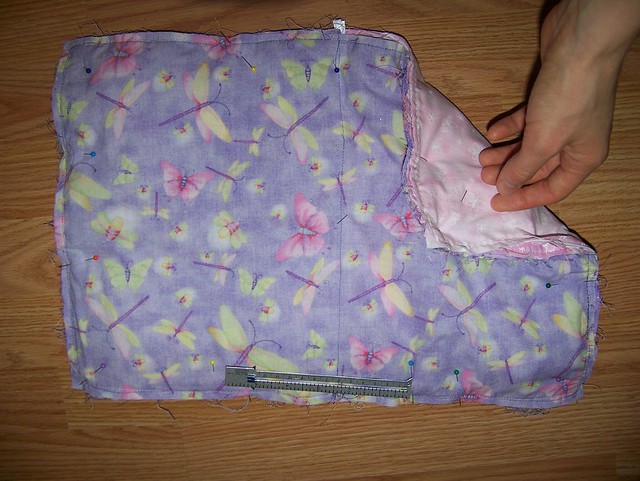
Now pin the purple Back to the pink Back, right sides together, making sure that the both are right side up! When you are looking at it like in the picture below, your pink front pocket will be on the right, and your purple front pocket will be on the left. Pin it well. Sew with a 1/2 inch seam allowance all the way around, except for a 5 to 6 inch space on the bottom side. Because the layers are so thick, I sew with a slightly longer stitch, like about 3.0 instead of the regular 2.5.
I also like to sew in between my gathering stitches, because it makes a nicer looking ruffle. You have to pull out the stitches that are showing later, so you may or may not want to do this!
If you are doing a non-reversible cover:
Just put your Back and Back Lining together the same way. Lay out your Back with the pockets and everything on it, and pin the Back Lining to the top.
Turn the Bible cover right side out to make sure you didn’t catch in the ruffles or lace, and just go all the way around to double check that you’ve caught everything else in. If you haven’t, go back and take a slightly deeper seam. I also like to check the seam on the inside of the Bible cover, because sometimes it looks like you caught it in on the outside, when really you just barely caught it on the inside. Those places make weak spots, so go over those, too!

Turn it back wrong side out, and clip the corners to reduce the bulk. You can also trim the seams a little, but I don’t recommend getting much closer to the seam than 1/2 inch or else it will weaken the seams. Now turn it right side out again.
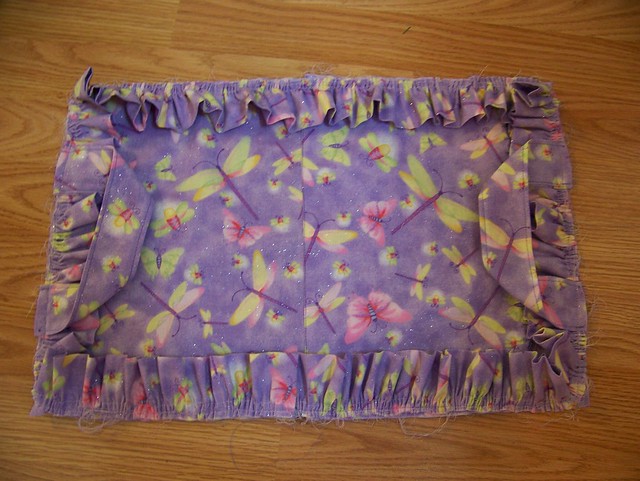
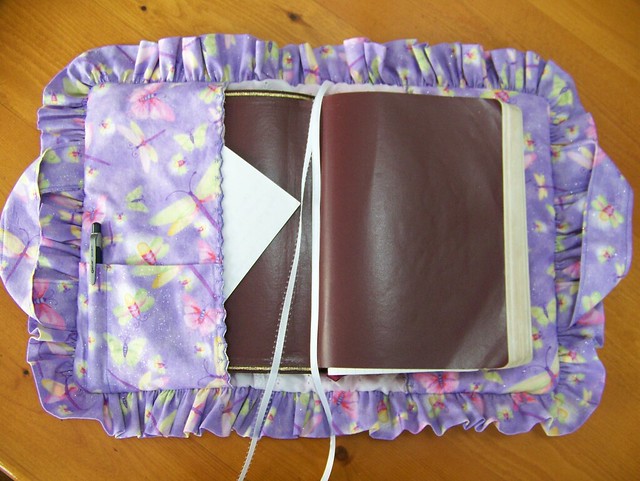
Step 6: Finishing
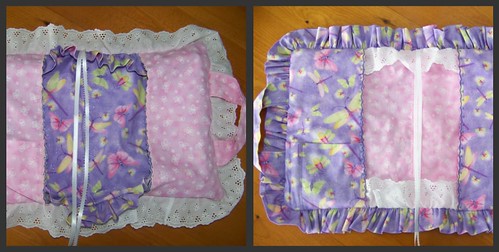
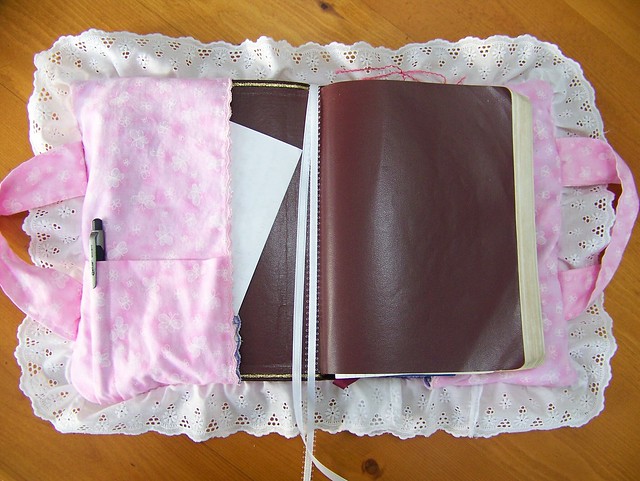
Now your Bible cover will look something like this:
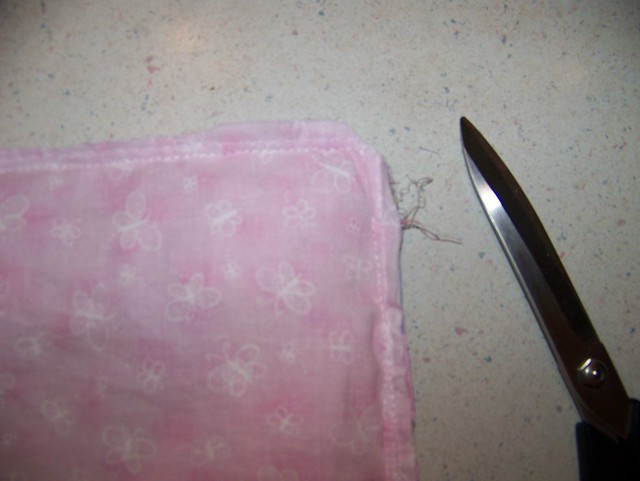
If there are any gathering stitches showing, use a seam ripper to pick or pull them out. Sometimes when you break the thread underneath, you can pull part of the thread out on top more easily (and vice versa) without having to sit and pick out every single stitch.

I don’t know if you can see what I did here, but I tried to take in a 1/2 seam allowance on the lace side and on the ruffle side so that later when I stitch it closed, it matches up with the rest of the Bible cover and doesn’t dip down…
Then I hand-stitched it closed, just using a small ‘back and forth’ stitch, so that the stitches would be pretty hidden. They’ll be hidden pretty well anyways, since the lace and ruffles are so full!
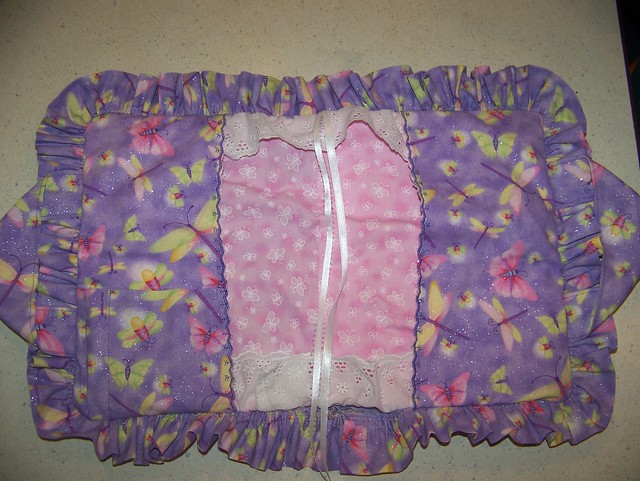
Ta-da! You did it! Now you have your very own reversible Bible cover!
{the inside pockets are good for tucking letters or bulletins into}
 |
| {The inside pockets are good for tucking letters or bulletins into!} |
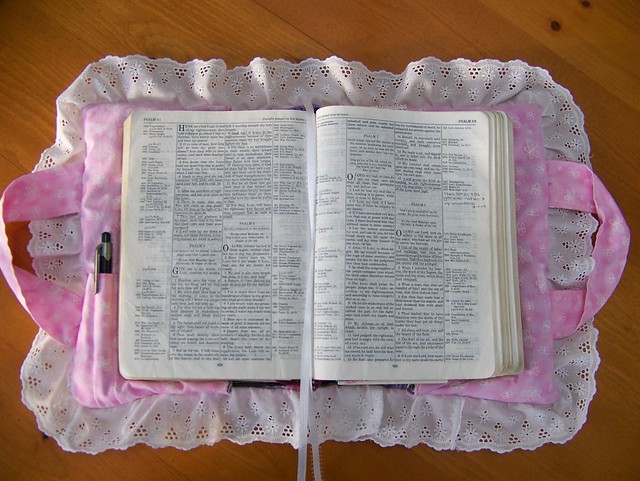
 |
| {The pink side} |

~*~
Doesn't this sound like a wonderful craft idea! I think it would be lots of fun to make matching Bible covers for each member in your family! {To see the original tutorial post on Seven Sisters Blog then click HERE!}
Happy sewing!
~ Bethany Ann ~
~ Bethany Ann ~
1 Words of Grace:
Very pretty!
Post a Comment